Generate Photos of Yourself Using Stable Diffusion and Dreambooth

Generate Photos of Yourself Using Stable Diffusion and Dreambooth
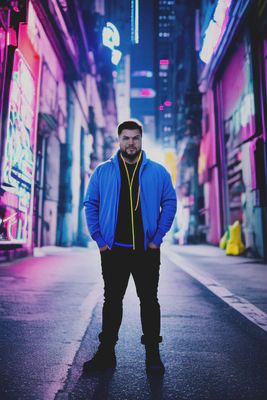
Hello! A month ago, I had fun training a custom model on images of myself to generate photos of me.
I’ll start by briefly explaining the technology, followed by the results, and finally, I’ll share the links and steps so you can do the same.
The Technology
In terms of tech, I used “Stable Diffusion” and “Dreambooth.” Stable Diffusion is an “AI” created by stability.ai. Here is a link to the release of this model: https://stability.ai/blog/stable-diffusion-public-release
Dreambooth is an open-source model created by a team at Google Research. This model can learn to replicate a subject by generating new images of that subject.
The Results:


And Now, the HOW-TO, in Brief
First, create an account on “HuggingFace 🤗” and generate an “access token,” which you’ll use later.
To train the model on photos of yourself, you need to prepare them:
Select about 20 different photos of yourself in various situations with different framing.
Resize all these photos to 512x512px and crop them. You can use the online tool birme.net.
Now that your image set is ready, go to this Google Colab to train a custom model:
Run the code step by step, following the instructions:
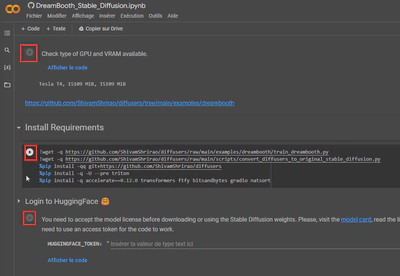
As shown in the screenshot above, you’ll reach the “HuggingFace 🤗” step. Here, accept the licenses/agreements, provide your access token, and click the “play” button to run the code block.
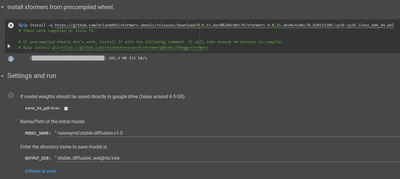
Continue step by step. In my case, I decided to save the model in my Google Drive.
At the “Start Training” step, I slightly modified the code to recognize the prompt “Alexis.” I don’t remember exactly what I wrote, but it was something like:
# You can also add multiple concepts here. Try tweaking `--max_train_steps` accordingly.

concepts_list = [
    {
        "instance_prompt":      "Alexis",
        "class_prompt":         "photo of a person",
        "instance_data_dir":    "/content/data/ukj",
        "class_data_dir":       "/content/data/person"
    },
    # Additional concepts can be added here
]

# `class_data_dir` contains regularization images
import json
import os
for c in concepts_list:
    os.makedirs(c["instance_data_dir"], exist_ok=True)

with open("concepts_list.json", "w") as f:
    json.dump(concepts_list, f, indent=4)
In the next block, I edited the following values: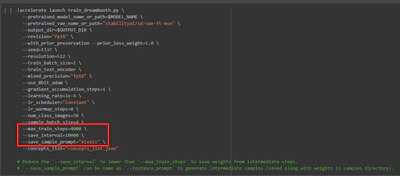
Run the blocks in order until you reach the “Convert weights to ckpt to use in web UIs like AUTOMATIC1111” step.
This step is super useful, and I recommend doing it because AUTOMATIC1111 is a fantastic web interface!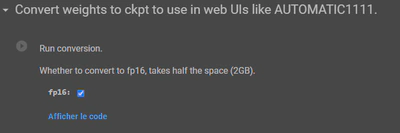
You can test your generation here: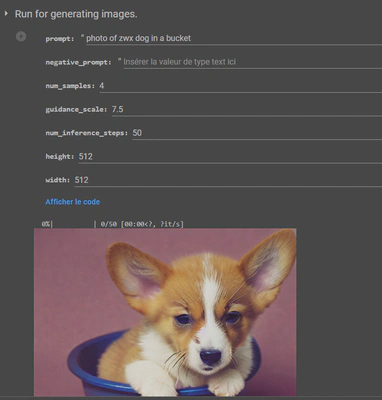
If you’re satisfied, copy the repo for the AUTOMATIC1111 web UI here:
https://github.com/AUTOMATIC1111/stable-diffusion-webui
The AUTOMATIC1111 README explains how to install the UI. Follow its step-by-step guide; I’ve copied it below:
Automatic Installation on Windows
- Install Python 3.10.6, checking “Add Python to PATH.”
- Install git.
- Download the stable-diffusion-webui repository by running:
git clone https://github.com/AUTOMATIC1111/stable-diffusion-webui.git
- Place model.ckpt in the models directory (see dependencies for details).
- (Optional) Place GFPGANv1.4.pth in the base directory, alongside webui.py (see dependencies for details).
- Run webui-user.bat from Windows Explorer as a regular, non-administrator user.
In our case, the model.ckpt is the one we generated earlier via Google Colab. It’s the model trained on our face. I also completed the optional step with GFPGANv1.4.pth.
Once everything is done, run the “webui-user.bat” file. Your project will now run locally, and you can generate images of yourself using this web interface. CONGRATULATIONS 🤩
Enjoy! 😎
Here are all the links/sources I used:
Stable Diffusion:
https://stability.ai/blog/stable-diffusion-public-release
https://github.com/CompVis/stable-diffusion
Dreambooth:
Stable Diffusion Web UI:
http://github.com/AUTOMATIC1111/stable-diffusion-webui
Google Colab for easy model training:
https://github.com/ShivamShrirao/diffusers/tree/main/examples/dreambooth