Oracle Cloud Infrastructure (OCI) - A Unique Free Plan Offering Impressive Performance
Oracle Cloud Infrastructure (OCI) - A Unique Free Plan Offering Impressive Performance
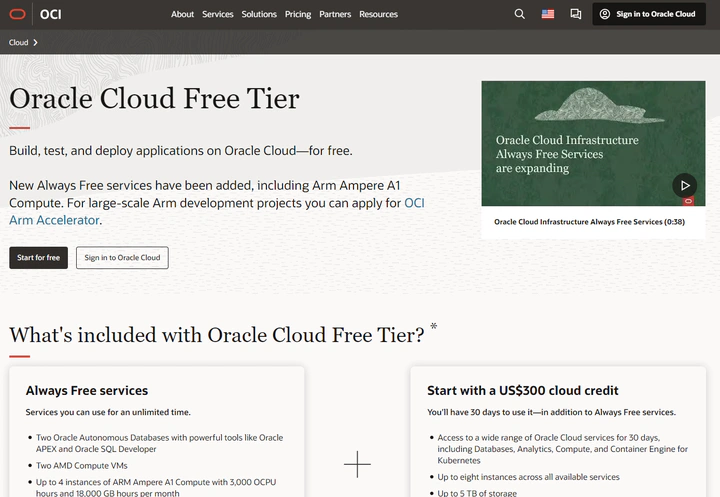
Oracle Cloud Infrastructure (OCI) stands out in the market by offering a unique free plan, providing a virtual machine (VM) with impressive performance at no cost. This offer is remarkable not only for being free but also for the quality and power of the infrastructure provided. Ideal for developers, students, or small businesses, this plan allows access to advanced cloud resources without incurring expenses.
With this offer, OCI allows you to configure a powerful VM with:
- Ampere ARM Processor: Efficient for fast data processing.
- 4 OCPUs (Oracle CPU Units): Capable of handling moderate to high workloads.
- 24GB RAM: Ideal for resource-intensive applications.
- 200GB Storage: Sufficient for most applications and projects.
This free configuration rivals paid offers, enabling advanced cloud computing exploration without an initial investment.
Creating an OCI Account
To get started, create your Oracle Cloud account.
https://www.oracle.com/cloud/free/
Once your account is created, we move on to creating the VM.
Creating the VM
Go to “Compute” then “Instances” from the main menu or the “pinned menu.”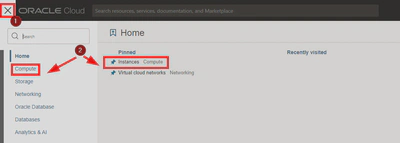
Select your “Compartment” and create an instance.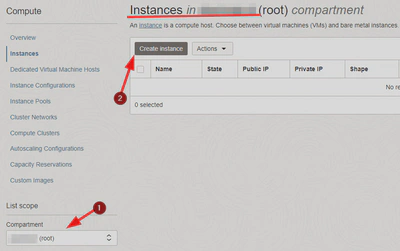
Name your VM and edit the image type according to your needs.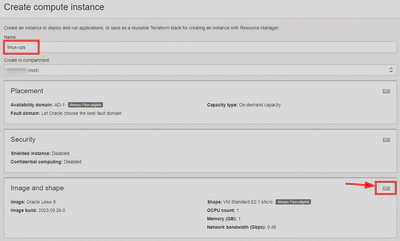
Change the hardware by selecting an Ampere ARM-based processor with 4 OCPUs and 24GB RAM.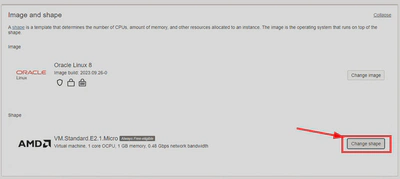

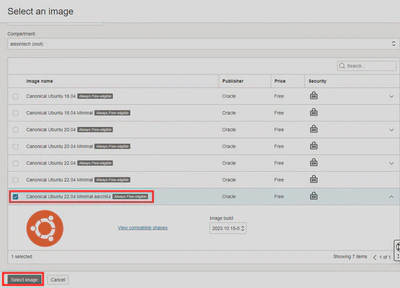
Choose Ubuntu as the OS, selecting the version adapted for ARM (aarch64).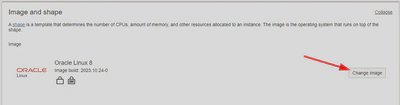
This results in the following configuration: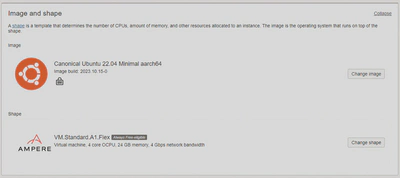
If necessary, create a network and ensure you have a public IPv4 address to link your VM to a domain. In my case, this was already configured, possibly due to previous setups.
If the network is not yet configured, simply create one by clicking on “edit” then: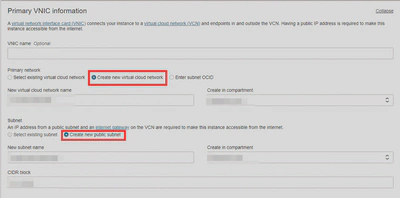
Ensure you have a public IPv4 address if you intend to link it to a domain:
Generate an SSH key pair and download the private key for SSH access to the machine.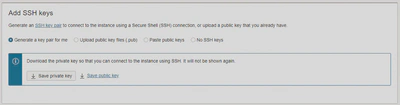
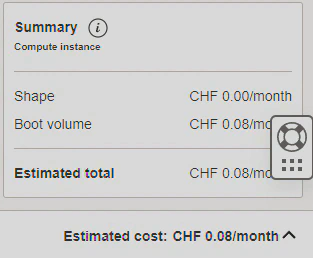
Now, set the boot volume size to 200GB
⚠️ It’s free only up to 200GB, so do not exceed this limit ⚠️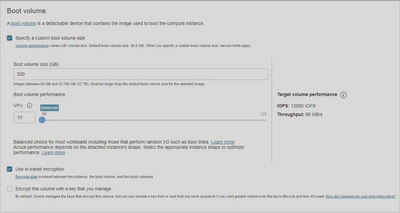
Important Note: Do not rely on the cost estimates displayed on OCI. According to various sources, including this YouTube video, following these steps should help you avoid additional charges.
Click “Create,” and there you have it—the VM is created!
Troubleshooting “Out of Capacity”
If you encounter difficulties creating your VM due to a lack of available capacity, consider one of these two solutions:
- Switch to the “pay as you go” plan but create a VM using only “always free tier” options.
- Use a script to create the VM when resources are unavailable. I had found one on GitHub and will look it up again to add it in this blog post.
Conclusion
To conclude, I haven’t yet managed to get my free machine. If it takes too long, I’ll switch to “pay as you go” with a budget cap configured to send alerts. However, in theory, I should still be at 0 CHF as I’ll only use free-tier resources.
I have several project ideas in mind, including transforming this Ubuntu VM into a Debian machine and installing YunoHost on it. But that’s for the future!
Thanks for reading, and see you next time!
AlexIn Tech